Viết test cho React component
Trong tutorial này, bạn sẽ học cách viết test cho React component.
Những gì có thể học trong chương này
Trong chương này, với mục tiêu viết test cho component đơn giản, cụ thể chúng ta sẽ làm những điều sau.
- Tạo test sử dụng nhóm library
testing-librarycho UI test - Tạo snapshot test sử dụng
Jest
Mục đích của chương này không phải là hiểu hoàn toàn test cho component. Thay vào đó, trọng tâm là trải nghiệm thực tế đó là gì. Do đó, nội dung khá tối thiểu, nhưng ngược lại, đây là nội dung đơn giản có thể thử test component trong thời gian ngắn, nên hãy thử thực hành.
Giả định là bạn có thể tạo component với React, nếu muốn biết cách sử dụng cơ bản của React, hãy tham khảo Tạo nút Like với React.
Test code hoàn chỉnh được tạo trong tutorial này có thể xem tại GitHub.
Những thứ cần thiết cho tutorial này
Để thực hiện tutorial này, cần có một số tool. Hãy chuẩn bị trước những thứ được liệt kê ở đây.
- Node.js (Tutorial này được xác nhận hoạt động với v18.15.0)
- NPM
- Yarn v1 (Tutorial này được xác nhận hoạt động với v1.22.19)
Về cách giới thiệu Node.js, vui lòng xem Chuẩn bị môi trường code.
Chúng ta sẽ sử dụng Yarn làm package management tool. Hãy install trước. Nếu đã install rồi thì có thể bỏ qua bước này.
shell
shell
Tạo React project
Tạo React project để sử dụng cho test. Hãy chạy lệnh sau.
shell
shell
Nếu thành công, thư mục component-test-tutorial sẽ được tạo trong thư mục hiện tại. Chạy lệnh sau để di chuyển vào component-test-tutorial.
shell
shell
Cấu trúc file bên trong component-test-tutorial sẽ như sau.
text
text
Ở đây hãy chạy lệnh sau.
shell
shell
Browser sẽ tự động mở, nếu hiển thị như hình sau thì việc tạo project đã thành công.
Component sẽ test
Ở đây, chúng ta sẽ tiến hành với ví dụ viết test cho button component đơn giản. Cụ thể, đây là button với text ban đầu là OFF, mỗi lần click button thì text chuyển đổi giữa ON/OFF.

Với component này, hãy test việc hiển thị ON/OFF chuyển đổi khi click button.
Tạo component cần test
Để tạo test, đầu tiên hãy implement component cần test. Tạo file với tên SimpleButton.tsx trong thư mục src.
shell
shell
Sau khi tạo file này, cấu trúc file của thư mục src sẽ như sau.
text
text
Nội dung của SimpleButton.tsx như sau.
SimpleButton.tsxtsxuseState } from "react";export constSimpleButton : () =>JSX .Element = () => {const [state ,setState ] =useState (false);consthandleClick = () => {setState ((prevState ) => !prevState );};return <button onClick ={handleClick }>{state ? "ON" : "OFF"}</button >;};
SimpleButton.tsxtsxuseState } from "react";export constSimpleButton : () =>JSX .Element = () => {const [state ,setState ] =useState (false);consthandleClick = () => {setState ((prevState ) => !prevState );};return <button onClick ={handleClick }>{state ? "ON" : "OFF"}</button >;};
Ở đây, hãy xác nhận behavior của component SimpleButton này. Hãy thay đổi file index.tsx như sau và save.
index.tsxtsxReact from "react";importReactDOM from "react-dom/client";import {SimpleButton } from "./SimpleButton";constroot =ReactDOM .createRoot (document .getElementById ("root") asHTMLElement );root .render (<React .StrictMode ><SimpleButton /></React .StrictMode >);
index.tsxtsxReact from "react";importReactDOM from "react-dom/client";import {SimpleButton } from "./SimpleButton";constroot =ReactDOM .createRoot (document .getElementById ("root") asHTMLElement );root .render (<React .StrictMode ><SimpleButton /></React .StrictMode >);
Sau đó hãy chạy lệnh sau.
shell
shell
Browser sẽ tự động mở, button như sau sẽ hiển thị. Ban đầu hiển thị OFF, hãy xác nhận ON và OFF chuyển đổi lần lượt khi click.
Nếu button nhỏ, hãy thử tăng tỷ lệ phóng to của browser.
Đến đây đã tạo xong component sẽ test lần này.
Cách tạo và thực hiện test sử dụng testing-library
Từ đây chúng ta sẽ vào phần cách tạo và thực hiện test. Lần này, chúng ta sẽ test việc hiển thị ON/OFF chuyển đổi khi click button.
Có nhiều cách test React component, ở đây chúng tôi giới thiệu cách sử dụng nhóm library gọi là testing-library có số người dùng tương đối nhiều. testing-library là nhóm library để test UI component, có thể render component và thao tác với component. Với testing-library, có thể coi là có thể test component đầy đủ.
Install testing-library
Hãy chạy lệnh sau để install testing-library.
shell
shell
Tạo test
Vậy hãy thực sự tạo test sử dụng testing-library. Đầu tiên, tạo file SimpleButton.test.tsx trong cùng thư mục src như trước.
shell
shell
Viết template để thực thi test trong file này.
SimpleButton.test.tsxtsxtest ("Khi click button, hiển thị ON/OFF chuyển đổi", async () => {// Viết nội dung test ở đây});
SimpleButton.test.tsxtsxtest ("Khi click button, hiển thị ON/OFF chuyển đổi", async () => {// Viết nội dung test ở đây});
Thêm nội dung test vào đây. Lần này chúng ta muốn test hiển thị ON/OFF chuyển đổi khi click button, nên test code sẽ theo flow sau.
- Render button
- Xác nhận hiển thị
OFF - Click button
- Xác nhận hiển thị
ON
Test component được thực hiện bằng cách kết hợp 2 điều sau sau khi render component.
- Thực hiện thao tác với component
- Xác nhận trạng thái của component
Ví dụ lần này cũng bắt đầu từ xác nhận trạng thái "hiển thị OFF" sau khi render button, thực hiện thao tác "click", sau đó lại xác nhận trạng thái "hiển thị ON". Khi bạn tự viết test cho component, việc ý thức thao tác và xác nhận trạng thái nào cần thực hiện sẽ giúp tạo test suôn sẻ hơn.
Đầu tiên hãy thử render button. Render component chỉ cần sử dụng render() của @testing-library/react như sau. Lưu ý là @testing-library/react này đã được install trong project vì chúng ta tạo React application bằng yarn create react-app.
SimpleButton.test.tsxtsxrender } from "@testing-library/react";import {SimpleButton } from "./SimpleButton";test ("Khi click button, hiển thị ON/OFF chuyển đổi", async () => {render (<SimpleButton />);});
SimpleButton.test.tsxtsxrender } from "@testing-library/react";import {SimpleButton } from "./SimpleButton";test ("Khi click button, hiển thị ON/OFF chuyển đổi", async () => {render (<SimpleButton />);});
Button đã được render, tiếp theo xác nhận hiển thị OFF. Cụ thể, lấy DOM của button (DOM ở đây hãy hiểu đại khái là object biểu diễn button), thực hiện assertion xem text của nó có bằng string OFF không. Lần này, để lấy DOM của button, chúng ta sử dụng getByRole(), một trong các query được @testing-library/react cung cấp. Đây là query lấy component có Role được chỉ định trong argument theo WAI-ARIA (specification web được định nghĩa chủ yếu để cải thiện accessibility). Chi tiết vui lòng tham khảo tài liệu chính thức. Cụ thể có thể viết như sau.
SimpleButton.test.tsxtsxrender ,screen } from "@testing-library/react";// ^^^^^^thêmimport {SimpleButton } from "./SimpleButton";test ("Khi click button, hiển thị ON/OFF chuyển đổi", async () => {render (<SimpleButton />);constsimpleButton =screen .getByRole ("button");});
SimpleButton.test.tsxtsxrender ,screen } from "@testing-library/react";// ^^^^^^thêmimport {SimpleButton } from "./SimpleButton";test ("Khi click button, hiển thị ON/OFF chuyển đổi", async () => {render (<SimpleButton />);constsimpleButton =screen .getByRole ("button");});
Và assertion text của button sử dụng toHaveTextContent() được @testing-library/jest-dom cung cấp. Truyền component vào expect() và gọi toHaveTextContent() như vậy có thể thực hiện assertion text mà component đó có. Cụ thể như sau.
SimpleButton.test.tsxtsxrender ,screen } from "@testing-library/react";import {SimpleButton } from "./SimpleButton";test ("Khi click button, hiển thị ON/OFF chuyển đổi", async () => {render (<SimpleButton />);constsimpleButton =screen .getByRole ("button");expect (simpleButton ).toHaveTextContent ("OFF");});
SimpleButton.test.tsxtsxrender ,screen } from "@testing-library/react";import {SimpleButton } from "./SimpleButton";test ("Khi click button, hiển thị ON/OFF chuyển đổi", async () => {render (<SimpleButton />);constsimpleButton =screen .getByRole ("button");expect (simpleButton ).toHaveTextContent ("OFF");});
Ở đây tạm thời chạy lệnh yarn test để xác nhận test pass.
shell
shell
Kết quả sẽ như sau.
Tiếp theo, click button. Thao tác component có thể thực hiện bằng @testing-library/user-event có trong testing-library. @testing-library/user-event là library thực thi các user event khác nhau bao gồm thao tác component trong test. Cụ thể, có thể thực hiện click button bằng cách truyền simpleButton tìm bằng query làm argument cho click().
SimpleButton.test.tsxtsxrender ,screen } from "@testing-library/react";importuserEvent from "@testing-library/user-event";import {SimpleButton } from "./SimpleButton";test ("Khi click button, hiển thị ON/OFF chuyển đổi", async () => {constuser =userEvent .setup ();render (<SimpleButton />);constsimpleButton =screen .getByRole ("button");expect (simpleButton ).toHaveTextContent ("OFF");awaituser .click (simpleButton );});
SimpleButton.test.tsxtsxrender ,screen } from "@testing-library/react";importuserEvent from "@testing-library/user-event";import {SimpleButton } from "./SimpleButton";test ("Khi click button, hiển thị ON/OFF chuyển đổi", async () => {constuser =userEvent .setup ();render (<SimpleButton />);constsimpleButton =screen .getByRole ("button");expect (simpleButton ).toHaveTextContent ("OFF");awaituser .click (simpleButton );});
Tiếp tục, thực hiện assertion sau khi button được click. Tương tự sử dụng toHaveTextContent(), nhưng lần này xác nhận text của button là ON.
SimpleButton.test.tsxtsxrender ,screen } from "@testing-library/react";importuserEvent from "@testing-library/user-event";import {SimpleButton } from "./SimpleButton";test ("Khi click button, hiển thị ON/OFF chuyển đổi", async () => {constuser =userEvent .setup ();render (<SimpleButton />);constsimpleButton =screen .getByRole ("button");expect (simpleButton ).toHaveTextContent ("OFF");awaituser .click (simpleButton );expect (simpleButton ).toHaveTextContent ("ON");});
SimpleButton.test.tsxtsxrender ,screen } from "@testing-library/react";importuserEvent from "@testing-library/user-event";import {SimpleButton } from "./SimpleButton";test ("Khi click button, hiển thị ON/OFF chuyển đổi", async () => {constuser =userEvent .setup ();render (<SimpleButton />);constsimpleButton =screen .getByRole ("button");expect (simpleButton ).toHaveTextContent ("OFF");awaituser .click (simpleButton );expect (simpleButton ).toHaveTextContent ("ON");});
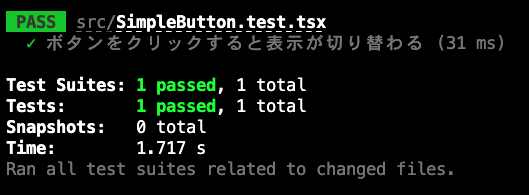
Với trạng thái này, chạy lệnh yarn test để xác nhận test pass. Kết quả sẽ như sau.
Đây là flow tạo test cho component sử dụng testing-library. Từ testing-library, ngoài những gì giới thiệu ở đây, còn cung cấp nhiều chức năng query, assertion và user event khác. Dù là tiếng Anh, nhưng có giải thích chi tiết bằng tài liệu chính thức về query tại đây, assertion tại đây, user event tại đây. Khi tự tạo test, hãy xác nhận cả những điều đó.
Cách tạo và thực hiện snapshot test sử dụng Jest
Từ đây chúng tôi giải thích về phương pháp test gọi là "snapshot test".
Test trước đó là xác nhận một phần (ví dụ: text) của trạng thái component, nhưng "snapshot test" là test để xác nhận toàn bộ trạng thái component. Chính xác hơn, lưu DOM của component nguyên vẹn và xác nhận DOM đã lưu đó có khớp với DOM được tạo khi render component lúc thực thi test không (DOM là gì nếu không hiểu rõ, ở đây tạm hiểu là "object biểu diễn component").
"Snapshot test" có thể viết dễ dàng. Hơn nữa có thể xác nhận toàn bộ bao gồm style, nên có thể tận dụng như regression test đơn giản. Mặt khác, chính vì vậy đây là test không hoạt động cho đến khi tạo xong component, nên không phù hợp với phát triển test-first.
Về nguyên tắc, đối tượng của snapshot test không giới hạn ở component và DOM. Có thể thực hiện snapshot test cho nhiều đối tượng. Chi tiết vui lòng tham khảo tài liệu chính thức của Jest.
Vậy hãy thực sự thực hiện snapshot test. Tạo file SimpleButton.test.tsx trong cùng thư mục src như trước.
shell
shell
Nếu bạn tiếp tục thực hiện tutorial này từ "Cách tạo và thực hiện test sử dụng testing-library", cũng có thể viết thêm test case tạo từ đây vào SimpleButton.test.tsx.
Snapshot test bao gồm 2 bước sau.
- Đưa component vào trạng thái muốn xác nhận snapshot
- So khớp với snapshot
Ở đây chúng ta xem xét thực hiện snapshot test về trạng thái button được render và chưa có thao tác gì, tức là trạng thái button hiển thị OFF. Vì muốn xác nhận trạng thái vừa render, chỉ cần thực hiện so khớp snapshot ngay sau khi render.
Dựa trên suy nghĩ này, hãy viết code thực tế. Render component sử dụng hàm render của @testing-library/react, so khớp snapshot sử dụng hàm toMatchSnapshot() của Jest và có thể viết như sau.
SimpleButton.test.tsxtsxrender } from "@testing-library/react";import {SimpleButton } from "./SimpleButton";test ("Vừa render hiển thị OFF", () => {constview =render (<SimpleButton />);expect (view .container ).toMatchSnapshot ();});
SimpleButton.test.tsxtsxrender } from "@testing-library/react";import {SimpleButton } from "./SimpleButton";test ("Vừa render hiển thị OFF", () => {constview =render (<SimpleButton />);expect (view .container ).toMatchSnapshot ();});
Jest đơn lẻ không thể render React component. Vì vậy, cần sử dụng library để render component. Có nhiều library, nhưng ở đây chúng tôi sử dụng @testing-library/react đã giới thiệu trong chương trước "Cách tạo và thực hiện test sử dụng testing-library".
Sau khi tạo test file, chạy lệnh yarn test.
shell
shell
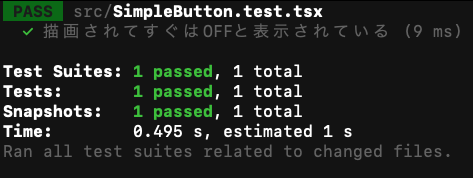
Sẽ hiển thị như sau, có thể thấy test được thực thi và thành công (PASS).
Bây giờ, lúc này trong thư mục src sẽ có thư mục __snapshots__ được tự động thêm vào. Đây là thư mục Jest lưu file cho snapshot test. Snapshot test của Jest lần chạy đầu tiên tạo file cho snapshot test, từ lần thứ 2 thực hiện so khớp. Vì bây giờ là lần chạy đầu tiên, file và thư mục chứa nó được tự động tạo.
Ở đây để biết thêm một chút về snapshot test, hãy nhìn vào nội dung file cho snapshot test được tạo.
SimpleButton.test.tsx.snap được tạo trong thư mục __snapshots__ như sau.
SimpleButton.test.tsx.snapjsexports [`Vừa render hiển thị OFF 1`] = `<div><button>OFF</button></div>`;
SimpleButton.test.tsx.snapjsexports [`Vừa render hiển thị OFF 1`] = `<div><button>OFF</button></div>`;
Như vậy, file cho snapshot test bao gồm tên test case và snapshot sử dụng trong test case đó.
Bây giờ, snapshot được tạo lần này bao gồm tag button có text OFF và element div là parent element của nó. Điều này khớp chính xác với DOM của component SimpleButton vừa tạo (element div là element được tự động tạo khi khởi động React). Snapshot test này mỗi lần thực thi sẽ render component SimpleButton và xác nhận xem có sự khác biệt với snapshot vừa tạo không.
Ví dụ, nếu do sai sót nào đó mà component SimpleButton hiển thị ON khi render, sẽ bị phát hiện bởi snapshot test này.
Ở đây, hãy xác nhận tình huống fail. Thêm thay đổi để component SimpleButton hiển thị ON khi render.
SimpleButton.tsxtsxuseState } from "react";export constSimpleButton : () =>JSX .Element = () => {const [state ,setState ] =useState (true);// Thay đổi từ false sang true ^^^^consthandleClick = () => {setState ((prevState ) => !prevState );};return <button onClick ={handleClick }>{state ? "ON" : "OFF"}</button >;};
SimpleButton.tsxtsxuseState } from "react";export constSimpleButton : () =>JSX .Element = () => {const [state ,setState ] =useState (true);// Thay đổi từ false sang true ^^^^consthandleClick = () => {setState ((prevState ) => !prevState );};return <button onClick ={handleClick }>{state ? "ON" : "OFF"}</button >;};
Với trạng thái này, chạy lệnh yarn start, có thể thấy giá trị khởi tạo của text button được render là ON.
Bây giờ, chạy lệnh yarn test.
shell
shell
Snapshot test trước đó được thực thi, nhưng lần này test không pass và diff giữa component được render và snapshot hiển thị.
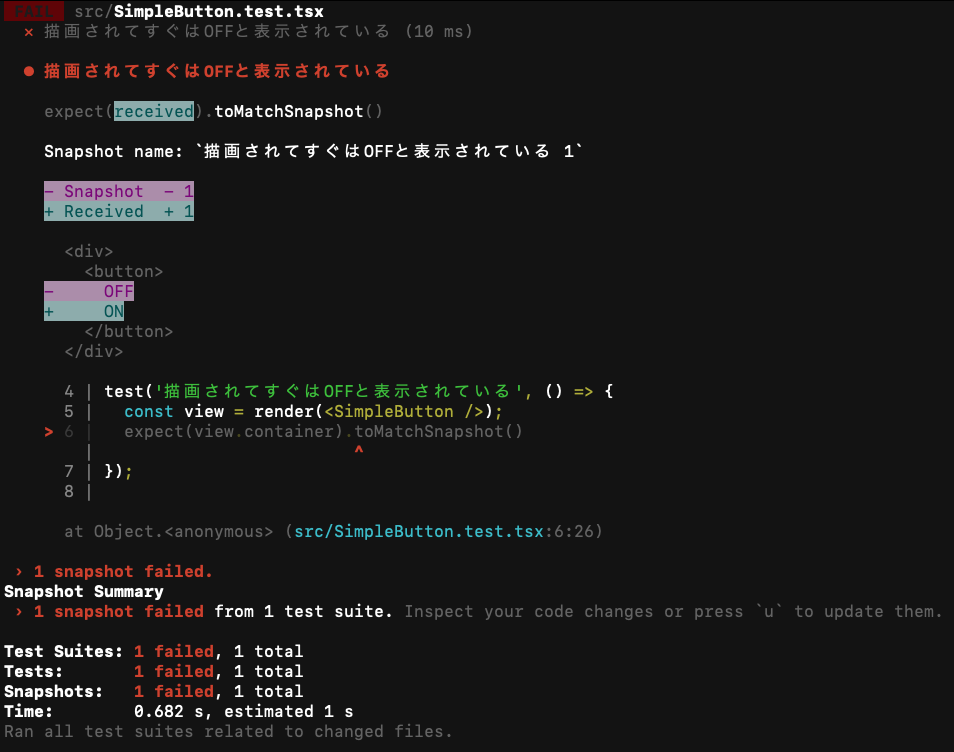
Lần này chúng ta đã thay đổi giá trị khởi tạo của text trong button, nhưng hầu hết các thay đổi đối với DOM như thay đổi từ tag button sang tag div hay thêm class vào tag button đều có thể phát hiện bằng snapshot test.
Cách thực hiện snapshot test chi tiết và best practice, nếu muốn biết thêm thông tin, vui lòng tham khảo tài liệu chính thức của Jest.
Đến đây tutorial snapshot test sử dụng Jest đã hoàn thành. Ngoài ra, tutorial test React component cũng đã hoàn thành.